


In this thirdweb x Hashnode hackathon post I wanna show you how to build a location-based NFT browser game using thirdweb. Think Pokémon GO™️ but instead of Pokémon, you capture NFT in the wild!
These are the technologies and frameworks being used in this game:
- web3/blockchain integration: thirdweb, Alchemy
- storage/database: Firebase
- geolocation: Google Maps API
- server: Node JS
- client: React JS
Let's Rock-n-code!
(All the codes here are on my github so feel free to clone it, fork it, and star it!)
The client
The easiest way to create a React app is to use, well, create-react-app. Let's call our game treasure-hunt and use create-react-app to create it:
npx create-react-app treasure-hunt
First, we want to build a "main screen" that presents a game intro page, along with a wallet connect button to start. This task has been made extremely easy through thirdweb, which provides React UI components and hooks directly. But before we can use them, we need to npm install them first:
npm install --save @3rdweb/react @3rdweb/hooks
Open your favourite editor, and edit src/index.js:
import React from 'react';
import ReactDOM from 'react-dom';
import { ThirdwebProvider } from "@3rdweb/react";
import Main from './Main';
import reportWebVitals from './reportWebVitals';

ReactDOM.render(
  <React.StrictMode>
    <ThirdwebProvider connectors={{ injected: {} }} supportedChainIds={[80001]}>
      <Main />
    </ThirdwebProvider>
  </React.StrictMode>,
  document.getElementById('root')
);
reportWebVitals();
Note that we wrap the <Main /> screen component with ThirdwebProvider. It accepts a few props: connectors specifies what wallets it is going to support. For now, we focus on MetaMask and hence we have { injected: {} } for that. supportedChainIds is the chains that we want to live on. We put in 80001 for Polygon Mumbai testnet.
Now create a new file src/Main.js and edit it:
import { useWeb3 } from "@3rdweb/hooks";
import './Main.css';
import App from './App';
function Main() {
const { address, connectWallet } = useWeb3();
return (
address ?
(
<App/>
)
:
(
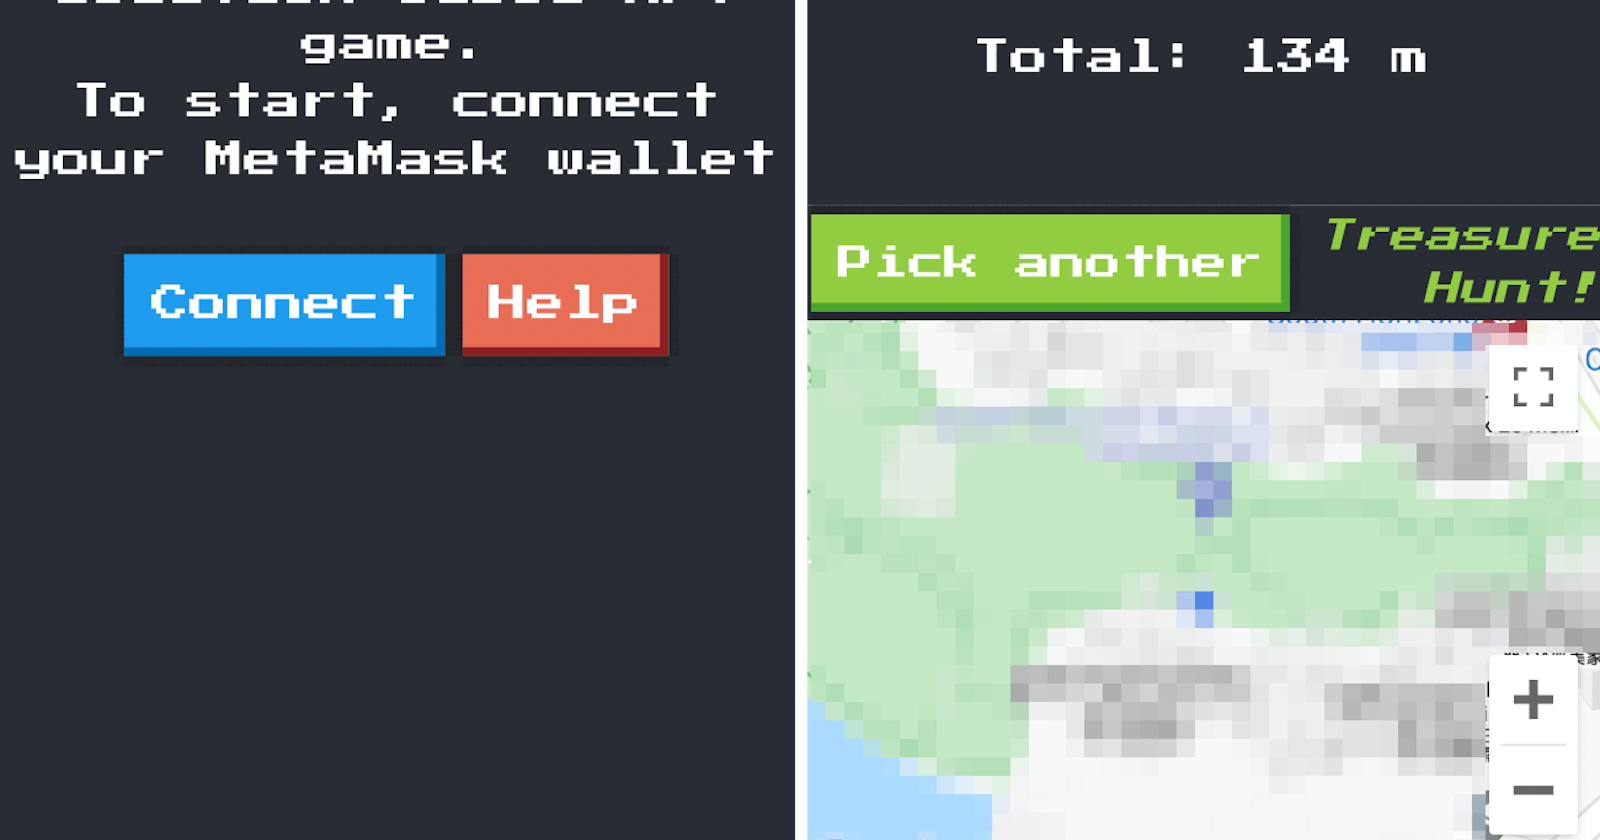
<div className="Main">
<div>
<em>Treasure Hunt</em> is a <br/>location-based NFT game.<br/>
To start, connect your MetaMask wallet<br/><br/>
</div>
<div>
<button onClick={() => connectWallet('injected')}>Connect</button>
<button>Help</button>
</div>
</div>
)
);
}
export default Main;
The hook useWeb3 returns, among other things, connectWallet which is a function to call in order to initialise the wallet connection, and address, if connected, the wallet address.
And that's it! Isn't it very simple and neat? All the cool stuffs are handled by thirdweb. And there are more it can do! Let's move on.
Creating project on thirdweb
We'd need to create a project on thirdweb and Firebase before we can use some of their cool features. Let's start with thirdweb.
Go here and follow their instructions to create a project. Be sure to pick Polygon Mumbai when choosing a network.
Once you have access to the dashboard, click on "Create Project". Again, pick Polygon Mumbai as the network. Give it a name and description: let's simply call it "Treasure Hunt"! Your wallet should prompt you a few times to authorise the transaction of deploying a contract.
The wallet address you use to connect to thirdweb and create the project is important! Later on, we will need to include its PRIVATE KEY in our server code to mint the NFT for us. Choose it wisely! Avoid the one with lots of fund. Maybe simply create a new one just for this purpose. I know we are on testnet and it's play money but better make it a habit.
Now you should see your project main screen:
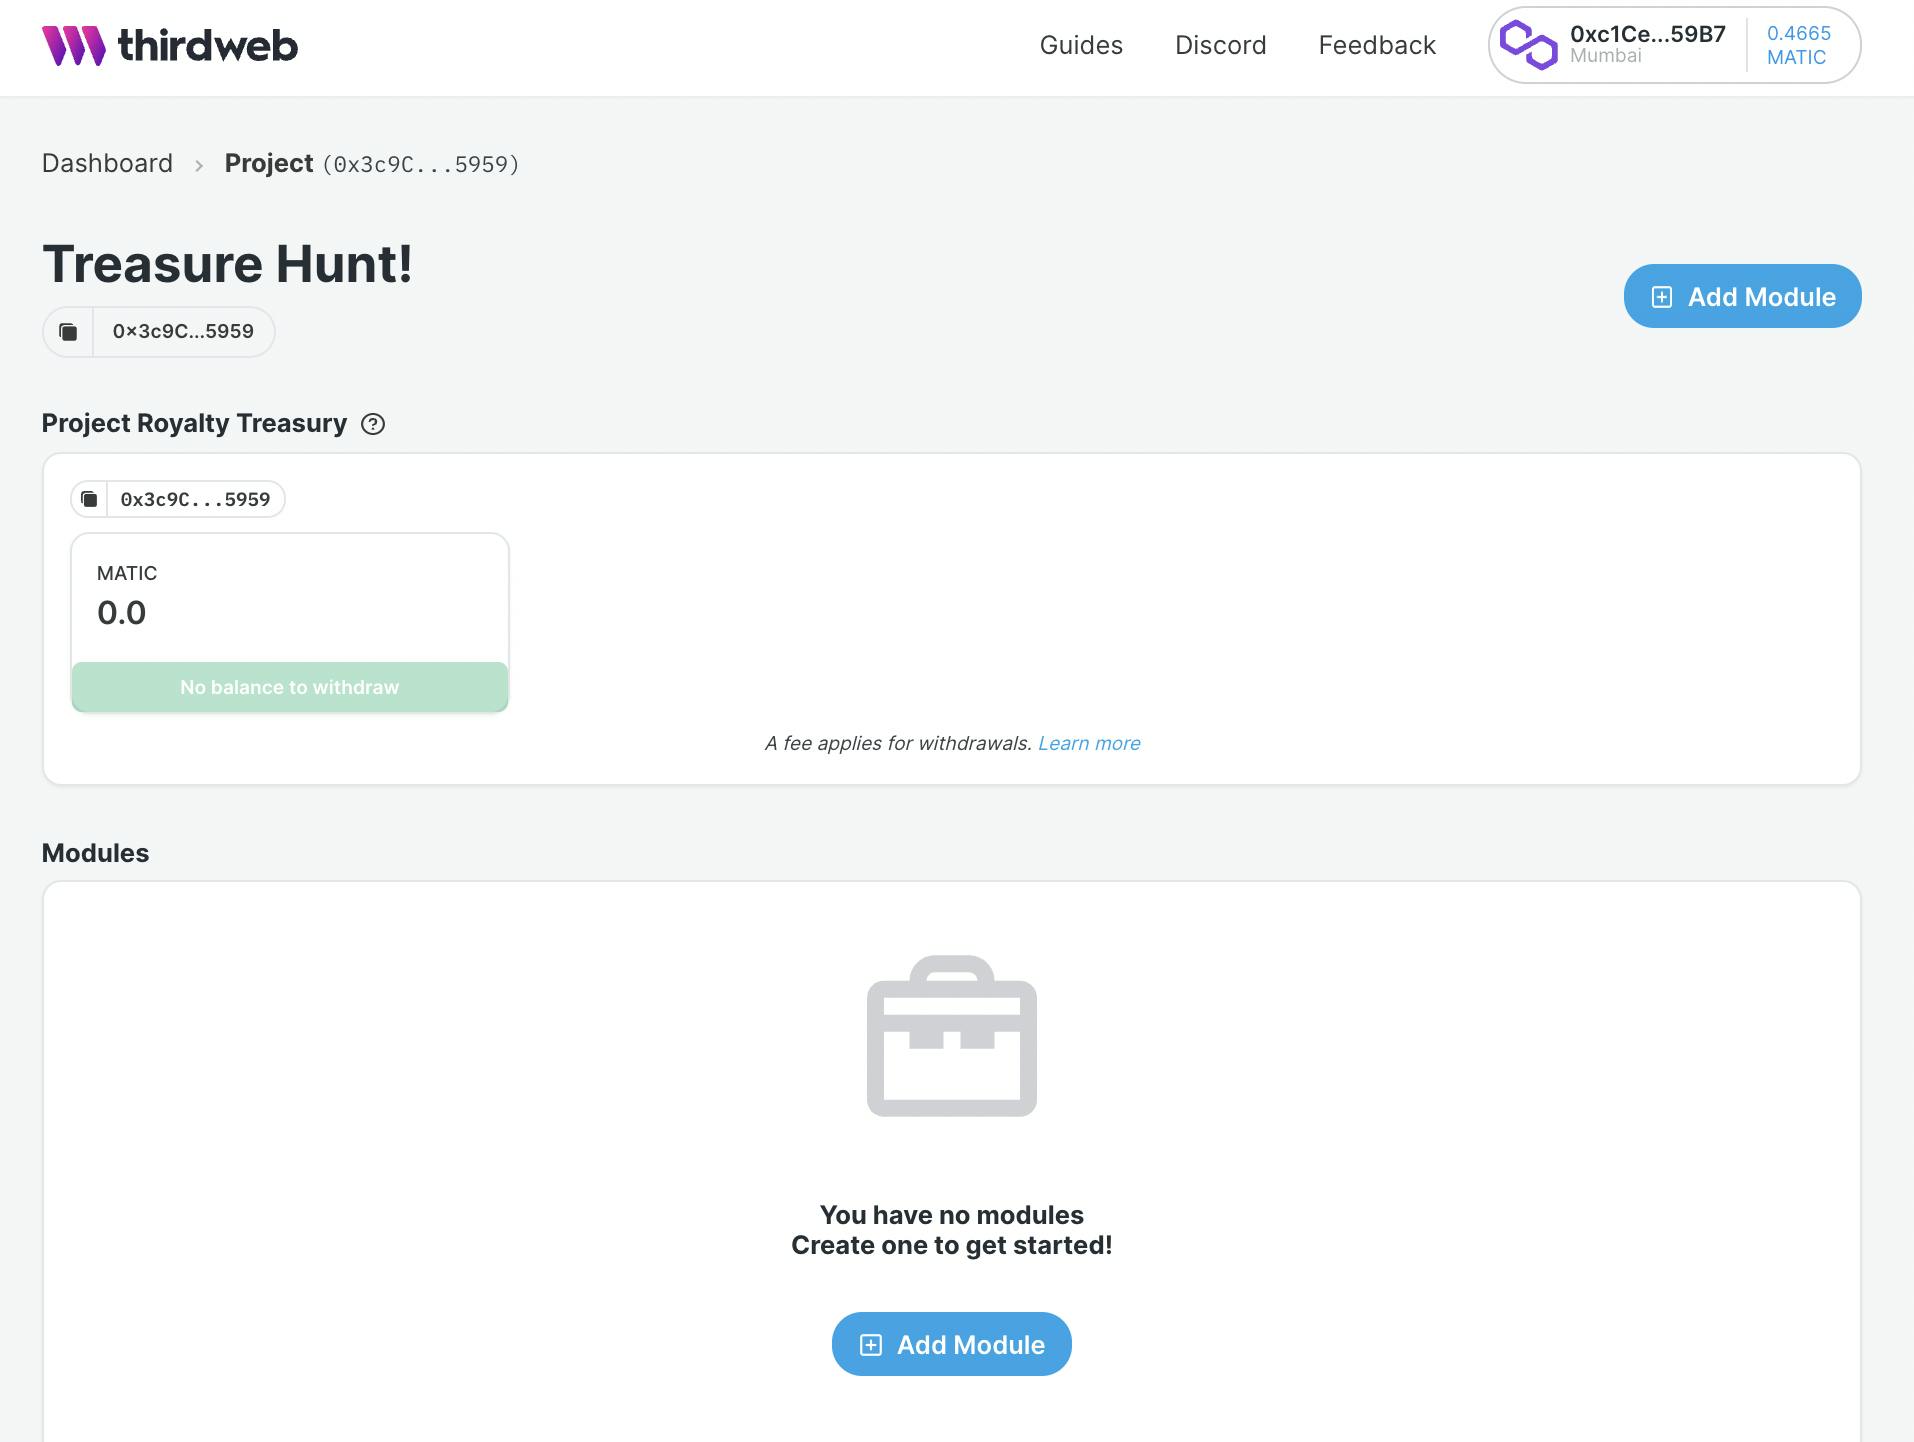
Next, we need to add a module. For our purpose we need NFT Collection. Click on "Add Module", select "NFT" and then "NFT Collection". Give it a name (e.g. "Treasure") and symbol (e.g. "TRES") and click "Deploy" to authorise its creation.
That's it. We've finished setting it up on thirdweb. We will need the address next to your NFT collection title later so let's copy it for the moment.
Creating project on Firebase
Next, we need to create a project on Firebase as well. If you haven't heard of Firebase before, it's a service provided by Google that gives you support on things like authentication, NoSQL database (called Firestore), and cloud storage in an absolutely painless way. We will be using Firestore and storage for our purpose.
Go here and add a project. Again, give it a name. Then, we need to add an app. In the project main page, choose "Web":
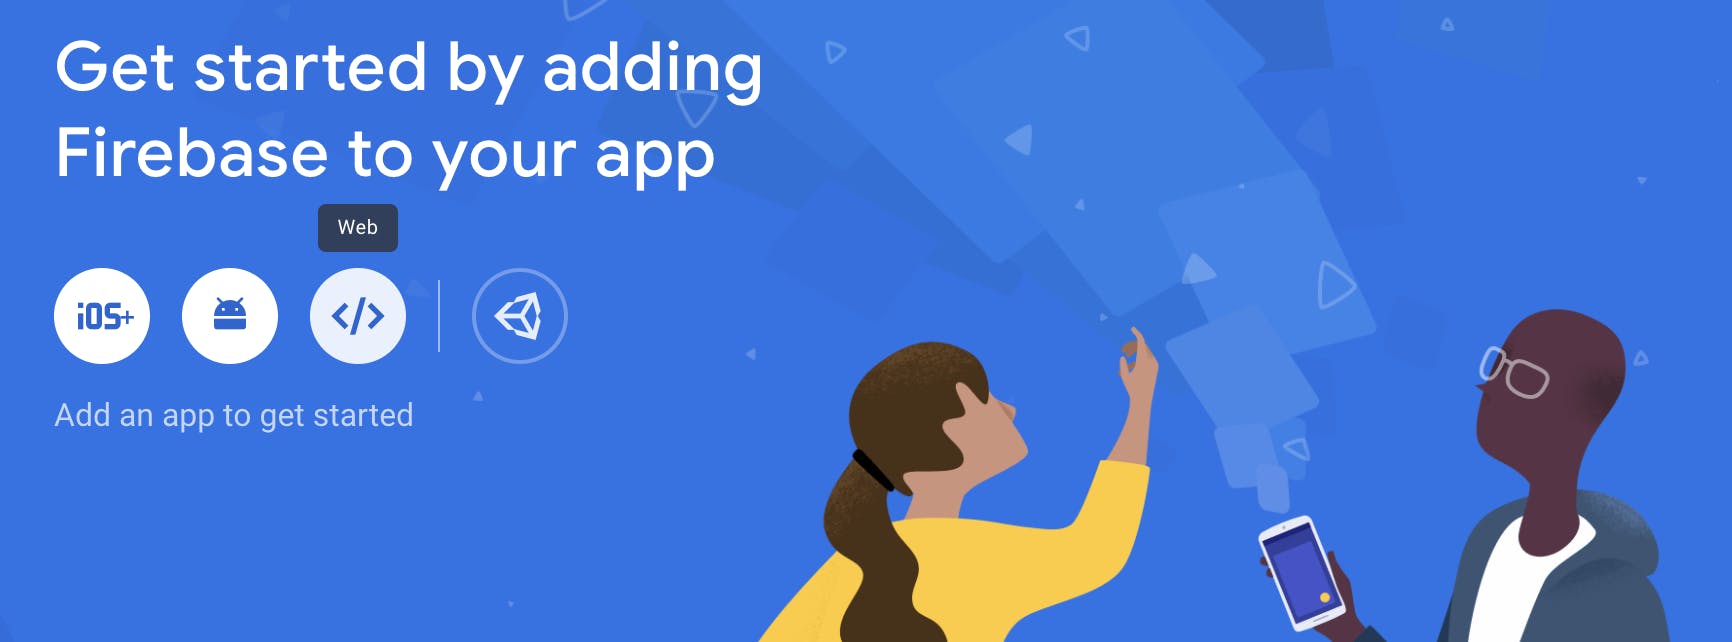
At the end of the set up you should see a listing of config code. Copy this snippet so it'll be handy later on:
const firebaseConfig = {
  apiKey: "xxxxxxxxxxxxxxxxxxxxxxxxxxxxxxxxxxxxxxxxx",
  authDomain: "xxxxxxxxx.firebaseapp.com",
  projectId: "xxxxxxxxx",
  storageBucket: "xxxxxxxxxappspot.com",
  messagingSenderId: "xxxxxxxxxxxx",
  appId: "xxxxxxxxxxxxxxxxxxxxxxxxxxxxxxxxxxx"
};
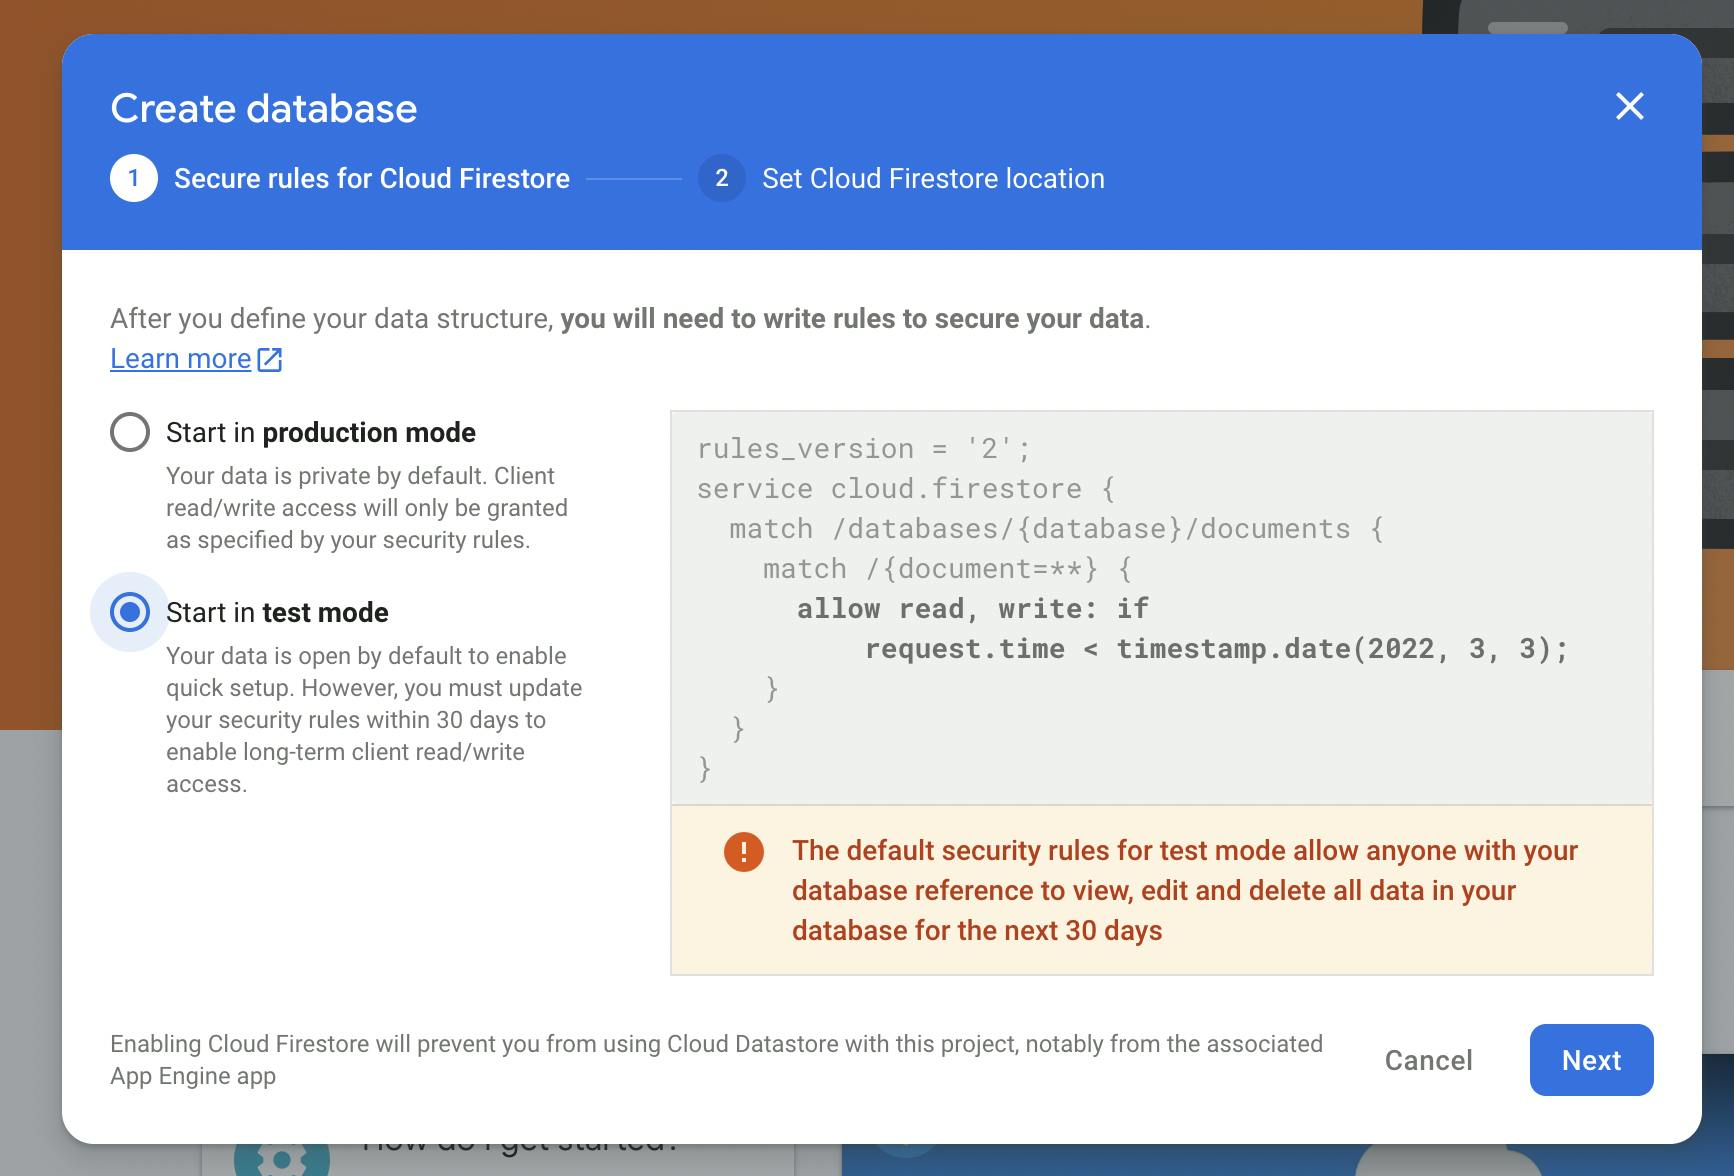
... and you're done! Well, not really. Let's add some data for later use. Go to "Firestore Database", click "Create database", and then "Start in test mode" for easier setup at the moment:
Once you're in the Firestore panel, click on "Start collection", and give it a name (e.g. "treasures"). And then we add a new document to it. It will have the following fields:
name: string (Name of the NFT treasure)description: string (Description)image: string (Image of the NFT treasure. It will be a Firebase storage link. More on this later)location: geopoint (Latitude/Longitude pair of the NFT treasure. More on this later)geohash: string (A hash value generated by the latitude/longitude. More on this later)minted: boolean (Whether this NFT has been minted or not)owner: string (Owner address of this NFT treasure)
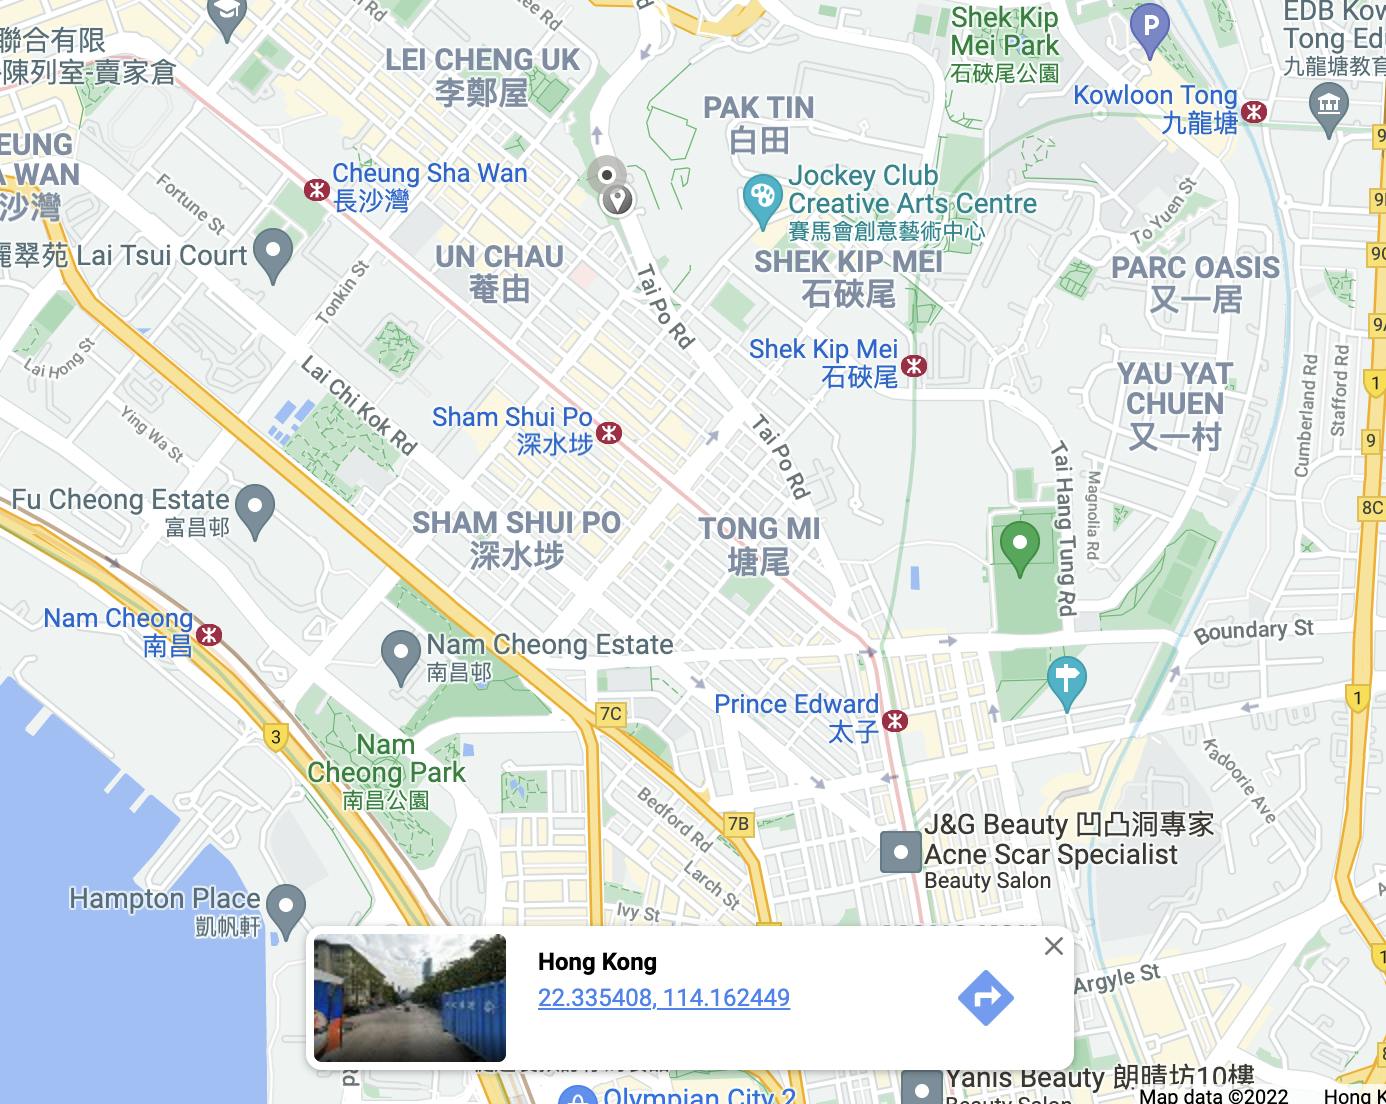
For testing purpose, why don't we set up a NFT treasure that is close to where you are? Go to Google Maps, randomly pick on a spot that is quite close to you, and note the number pair at the bottom. This is the latitude (the first number) and longitude (the second number) that we need for our location field.
For geohash, go here: movable-type.co.uk/scripts/geohash.html and enter the latitude/longitude to generate the hash value. For precision, use "8 characters".
For image, we will need another product: Firebase storage. Simply click on "Storage". Before we upload any files, make sure the rule is set for test mode:
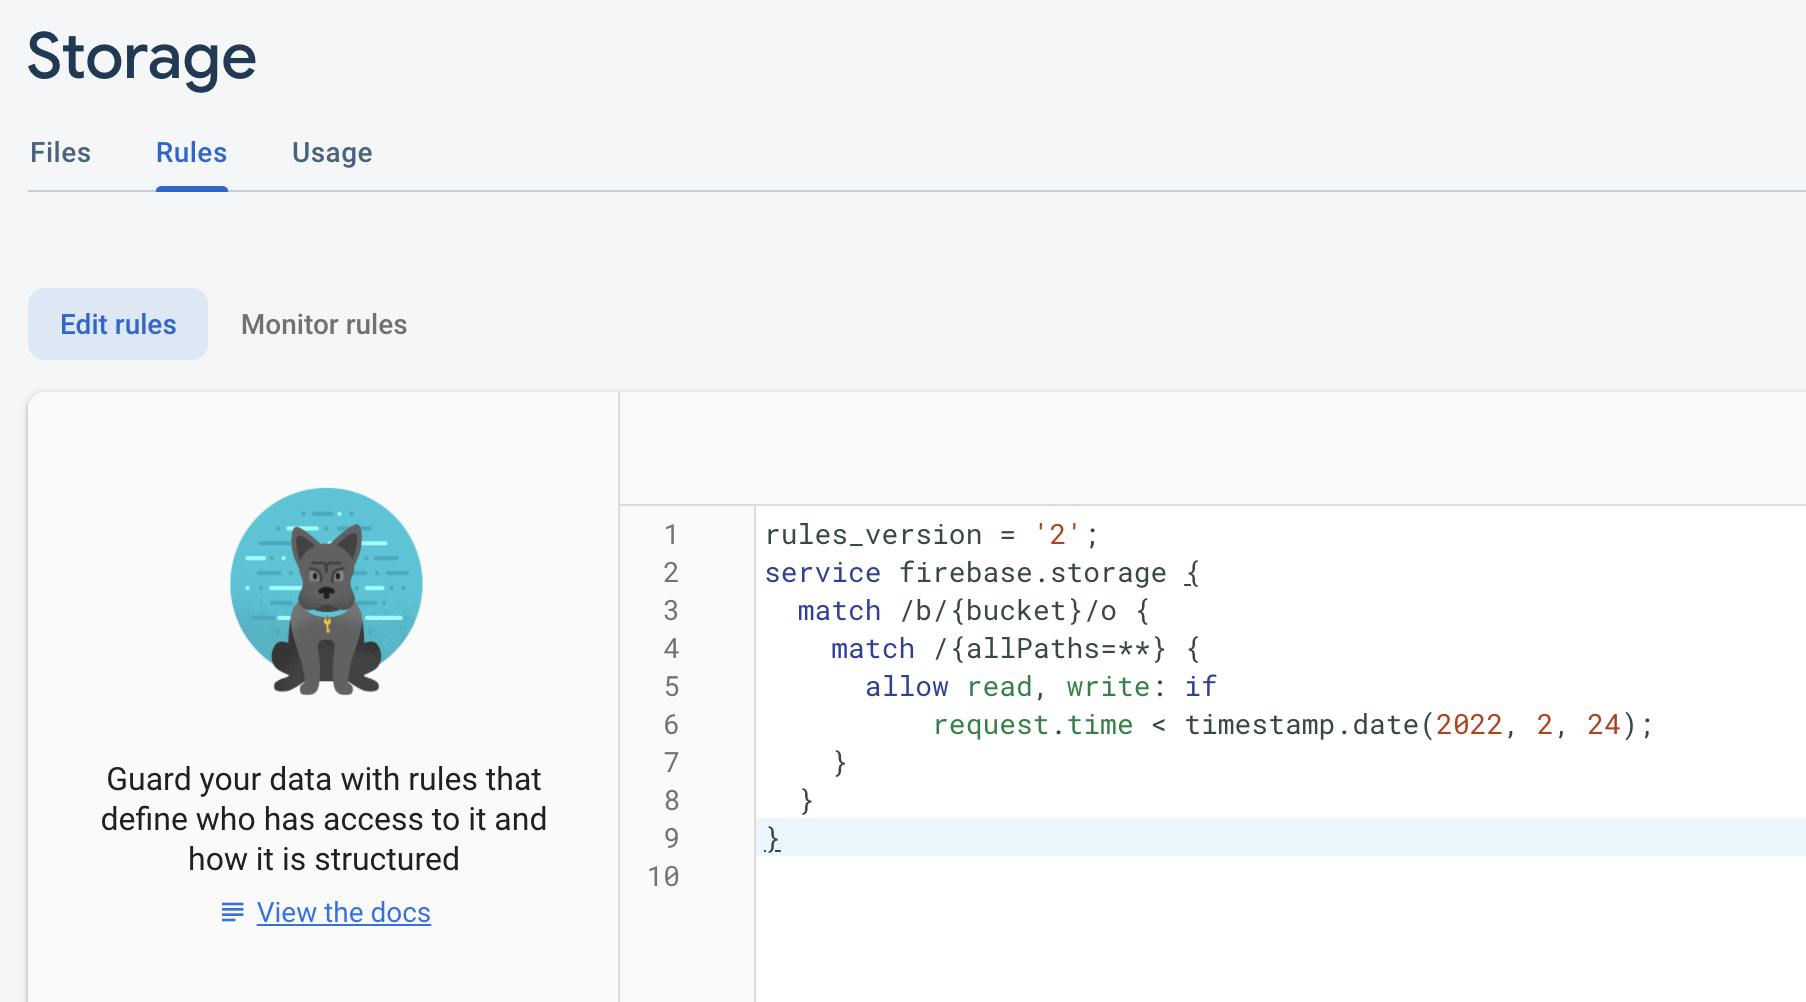
For easier copy-paste:
rules_version = '2';
service firebase.storage {
  match /b/{bucket}/o {
    match /{allPaths=**} {
      allow read, write: if
          request.time < timestamp.date(2022, 2, 24);
    }
  }
}
(for the timestamp, simply pick a date in the future)
Then, we go back to "Files", and upload an image for our NFT treasure. Once it is done, click on "File Location" to copy the location of it (it should start with gs://...)
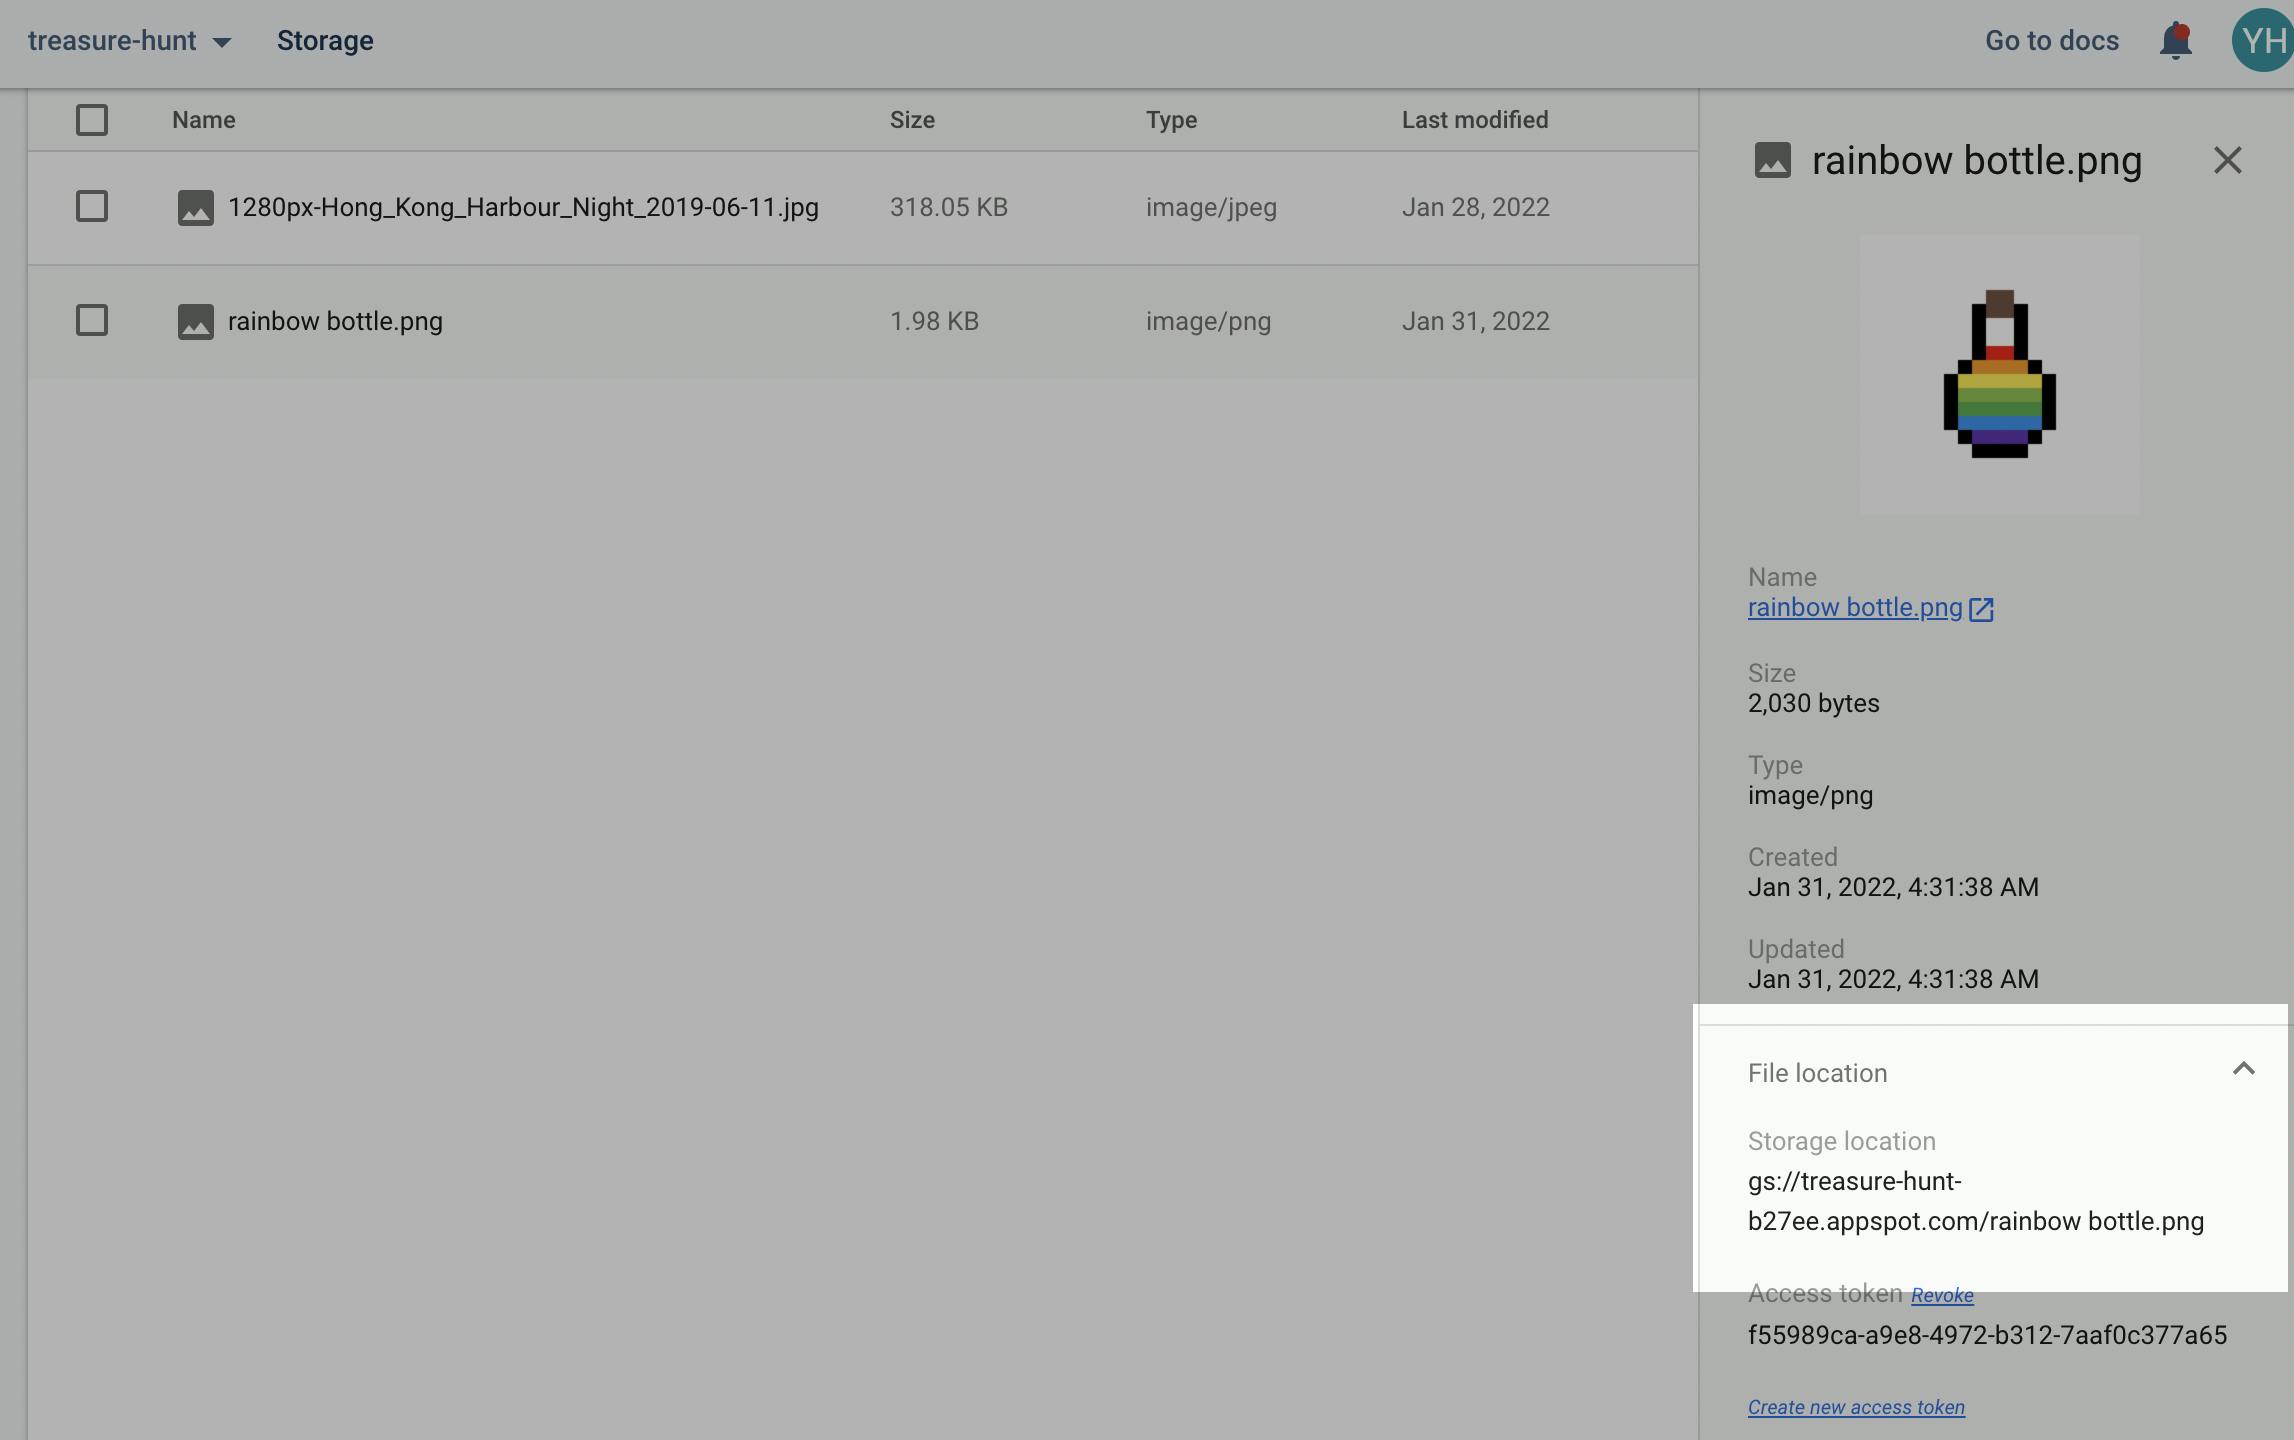
Go back to Firestore Database, and paste the location to the image field.
Now we have one NFT treasure in our database!
Creating project on Alchemy
Finally, we need one more project for our blockchain integration: Alchemy. Since all we need from it is a HTTP API key, I am going to point you to this tutorial and leave the rest to you as an exercise. Just note that:
- We only need the HTTP API key (it should look like
https://polygon-mumbai.g.alchemy.com/v2/...), so you can skip steps 2-4 altogether. - We are on Polygon Mumbai testnet.
The App
We are finally ready to write the App!
Let's do it in this way: simply go to github, download the code, and I'll explain all the essentials part-by-part.
Once you're ready, open src/App.js
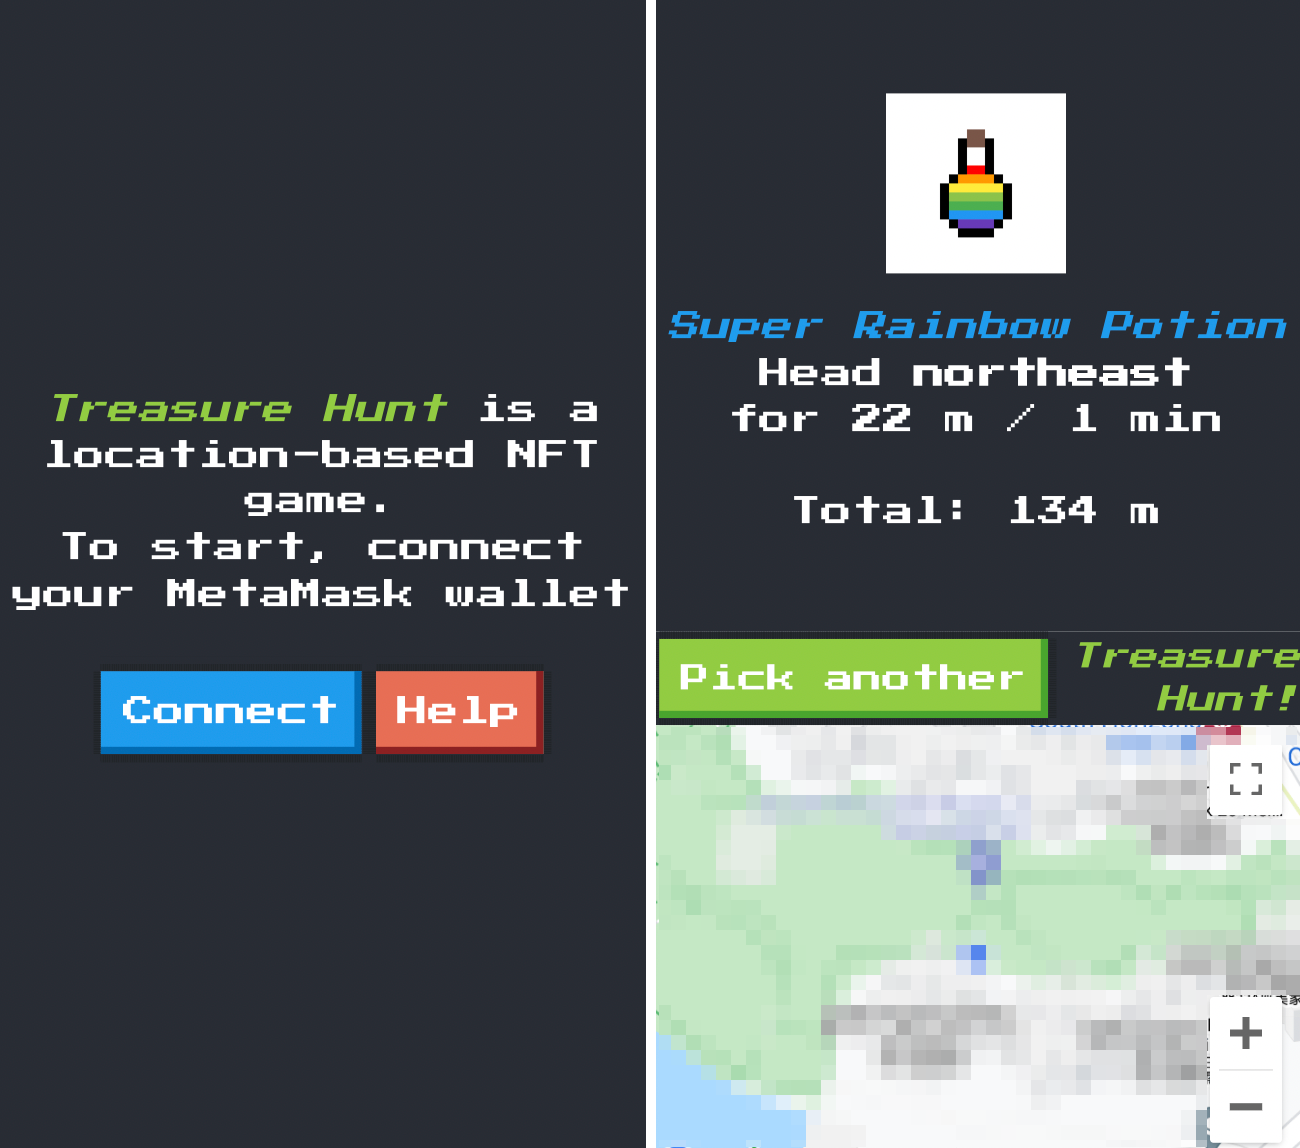
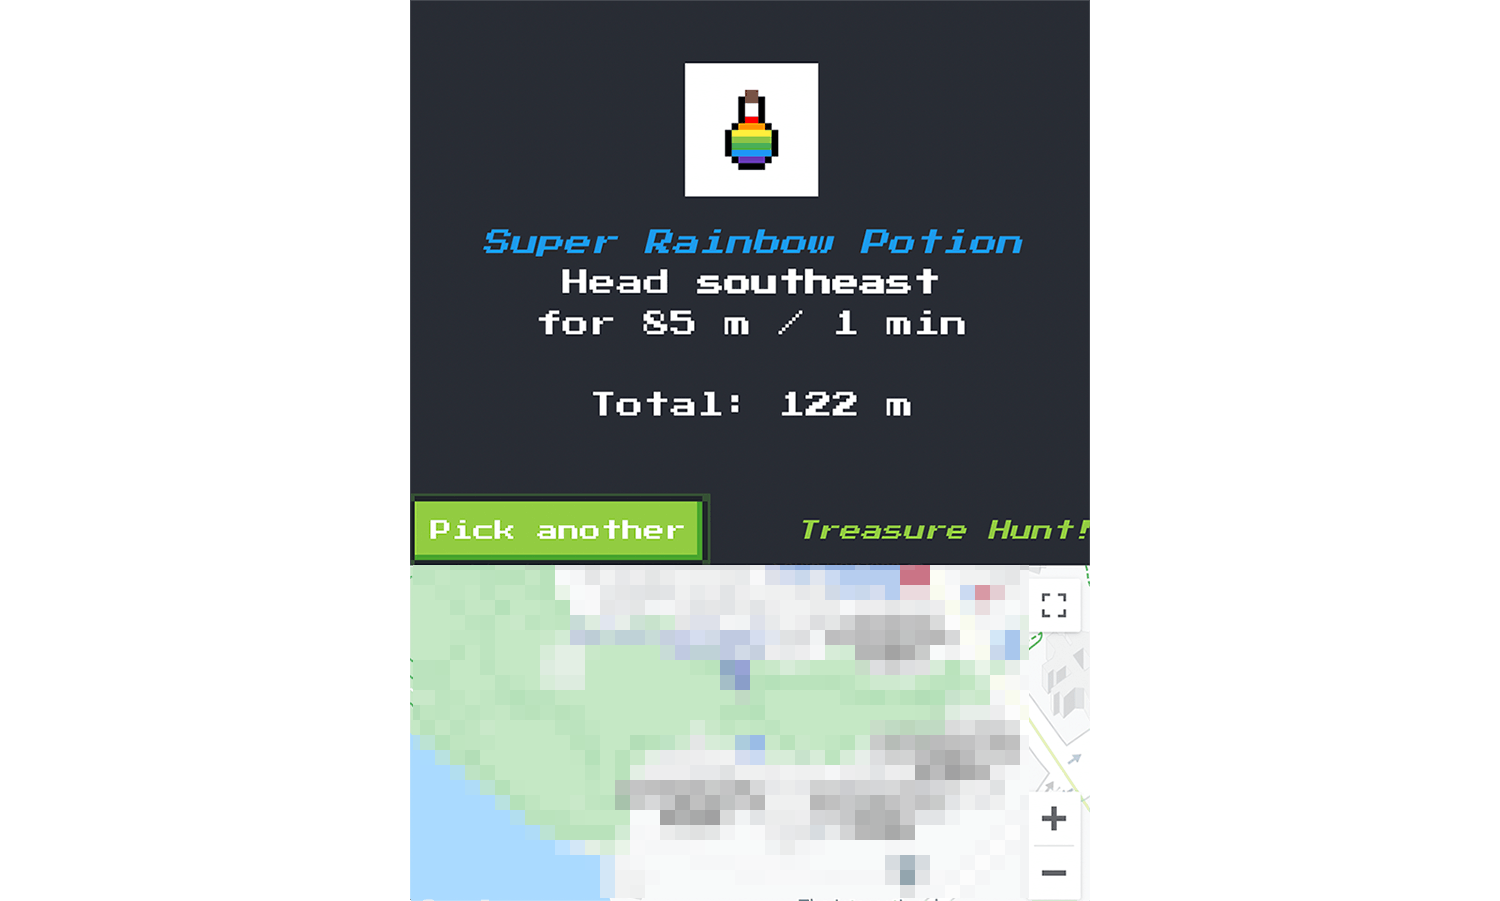
Let's briefly talk about the layout of the app. It consists of two parts: at the top, you have the instruction that tells you step-by-step on how to get to a NFT treasure, like a GPS NAT (e.g. "Go straight for 100 m"); at the bottom, you would see a Google map showing where you are:
Everything starts with your current location. So one of the useEffect hook is to get load the Google Maps (using this API loader), and then fetch the current location (browser's navigator.geolocation: note that this is when the browser prompt the user that this website is asking your location). We also start an interval that will check and update the user's location every second:
useEffect(() => {
    const loader = new Loader({
      apiKey: process.env.REACT_APP_GOOGLE_MAP_API_KEY,
      version: "weekly"
    });
    loader.load().then((g) => {
      google.current = g;
      map.current = new g.maps.Map(document.getElementById("map"), {
        center: { lat: 0, lng: 0 },
        zoom: 18,
        streetViewControl: false,
        fullScreenControl: false,
        mapTypeControl: false
      });

      if (navigator.geolocation) {
        navigator.geolocation.getCurrentPosition((pos) => {
          setOrigin([pos.coords.latitude, pos.coords.longitude]);
          currentPosition.current = [pos.coords.latitude, pos.coords.longitude];
        });
      }
    });
    const interval = setInterval(checkingPosition, 1000);
    return () => clearInterval(interval);
  }, []);
Once we have the initial location - we store it as the origin, we have another useEffect to query our Firestore database if there're any NFT treasures nearby (with 10 km). This is achieved by using geohash, and we make use of this geofire package:
useEffect(() => {
    (
      async () => {
        if (origin) {
          try {
            const radius = 10000; // in meter
            const bounds = geofire.geohashQueryBounds([origin[0], origin[1]], radius);
            if (bounds.length > 0) {
              const t = await Database.retrieveTreasures(bounds[0][0], bounds[0][1]);
              setTreasures(t);
              if (t.length > 0) {
                target.current = t[0];
                updateInstruction();
              } else {
                setInstruction('No treasure found within 10 km');
              }
            }
          } catch (err) {
            console.error(err);
            setInstruction('Error! Please try again later');
          }
        }
      }
    )();
  }, [origin]);
As you can see, we have abstracted all operations with Firestore to a Database object. Let's look at src/Database/index.ts:
import { firebaseApp } from './firebase.config';
import { getFirestore, collection, query, where, startAt, endAt, orderBy, getDocs } from "firebase/firestore";
import { getStorage, ref, getDownloadURL } from "firebase/storage";
import { Treasure } from './interfaces';

const Database = {
  /** Retrieve a list of items */
  retrieveTreasures: async function(start: string, end: string): Promise<Treasure[]> {
    const k = [];
    const firestore = getFirestore(firebaseApp);
    const storage = getStorage(firebaseApp);
    const collectionRef = collection(firestore, 'treasures');
    const q = query(collectionRef, where('minted', '==', false), orderBy('geohash'), startAt(start), endAt(end));
    const snapshot = await getDocs(q);

    for (const doc of snapshot.docs) {
      let data = doc.data();
      const storedImage = ref(storage, data.image);
      data.imageUrl = await getDownloadURL(storedImage);
      k.push(data);
    }

    return k;
  }
}

export default Database;
So we query the database by using the geohash and the condition that minted == false. The config file src/Database/firebase.config.ts contains the config code of Firebase. Remember the config code we've copied in Firebase? You can paste it here - or better yet, paste it in .env environmental variables and reference it here:
import { initializeApp } from "firebase/app";

const firebaseConfig = {
  apiKey: process.env.REACT_APP_FIREBASE_APIKEY,
  projectId: process.env.REACT_APP_FIREBASE_PROJECTID,
  storageBucket: process.env.REACT_APP_FIREBASE_STORAGE,
  appId: process.env.REACT_APP_FIREBASE_APPID,
  measurementId: process.env.REACT_APP_FIREBASE_MEASUREMENT
};

const firebaseApp = initializeApp(firebaseConfig);

export { firebaseApp };
Now, go back to src/App.js. If we successfully retrieved a list of treasures that are within 10 km, we use Directions service - which is part of the Google Maps API grand scheme - to get an "instruction" to get to it. The function updateInstruction() handles it:
const updateInstruction = () => {
    if (google.current && currentPosition.current && target.current) {
      let dir = new google.current.maps.DirectionsService();
      dir.route({
        travelMode: 'WALKING',
        origin: new google.current.maps.LatLng(currentPosition.current[0], currentPosition.current[1]),
        destination: new google.current.maps.LatLng(target.current.location.latitude, target.current.location.longitude)
      }, function(data, status) {
        if (status === 'OK') {
          setInstruction(data.routes[0].legs[0].steps[0].instructions);
          setDistance(data.routes[0].legs[0].steps[0].distance.text);
          setDuration(data.routes[0].legs[0].steps[0].duration.text);
        }
      });

      const d2 = distanceBetween(
        [currentPosition.current[0], currentPosition.current[1]],
        [target.current.location.latitude, target.current.location.longitude]
      );
      setTotalDistance(d2);
      if (d2 < 5) {
        setArrived(true);
      }
    }
  };
The important bit is the calculation of d2: the distance between the user's current location and the target's location, using Haversine formula (implemented in src/distance.ts). If it's less than 5 meters, you set arrived to true - or put it another way, YOU WIN! And the user can now claim that NFT treasure!
useEffect(() => {
    if (arrived && address && target.current) {
      fetch('/api/receive-treasure/'+target.current.geohash+'/'+address)
      .then(resp => resp.json())
      .then(data => {
        setInstruction('The Treasure NFT is now yours!')
      })
      .catch(err => {
        console.error(err);
      });
    }
  }, [arrived, address, target.current]);
And that leads us to our server-side code.
The server
We will use Node JS for our server-side code. They are all under the directory /api.
You may have notice that we haven't minted any NFT up to this moment. In fact, all treasure's data is on Firebase. We only mint the NFT when a player successfully reach the location and hit the claim button, and this is all done by, you know it, thirdweb again!
We need to install the packages first, this time for our server. Open a terminal and cd to the treasure-hunt directory. Then init the api directory by running:
mkdir api
cd api
npm install express dotenv
npm install firebase
npm install @3rdweb/sdk ethers
Now let's look at api/thirdsdk.js, it's our Thirdweb config file:
import { ThirdwebSDK } from "@3rdweb/sdk";
import ethers from "ethers";

import dotenv from "dotenv";
dotenv.config();

const thirdsdk = new ThirdwebSDK(
  new ethers.Wallet(
    process.env.PRIVATE_KEY,
    ethers.getDefaultProvider(process.env.ALCHEMY_API_URL),
  ),
);

export default thirdsdk;
VERY IMPORTANT: why do we need our private key here? Because the server is going to mint the NFT, and transfer it to the user, on behalf of us. BUT WE NEVER STORE THE PRIVATE KEY DIRECTLY IN CODE. Instead, we ALWAYS put it in our .env and reference it there. Last but not least, check your .gitignore and make sure it includes .env. There are bots that scan github looking for private key leakage, and remember: not your key, not your wallet! Another tip: use a dedicated development-only key!
Also see that ALCHEMY_API_URL? That's where you paste your Alchemy HTTP API. Again, better do it on .env.
The gem is in api/server.js:
import thirdsdk from './thirdsdk.js';
import { firebaseApp } from './firebase.config.js';
import { getFirestore, collection, query, where, limit, getDocs, setDoc} from "firebase/firestore";
import { getStorage, ref, getDownloadURL } from "firebase/storage";
import express from 'express';
import fs from 'fs';
import https from 'https';

const app = express.Router();

app.get('/api/test', (req, res) => {
  res.send({ hello: 'WORLD!' });
});

app.get('/api/receive-treasure/:geohash/:addr', async (req, res) => {
  const firestore = getFirestore(firebaseApp);
  const storage = getStorage(firebaseApp);

  const collectionRef = collection(firestore, 'treasures');
  const q = query(
    collectionRef,
    where('geohash', '==', req.params.geohash),
    where('minted', '==', false),
    limit(1)
  );

  try {
    const snapshot = await getDocs(q);

    if (!snapshot.empty) {
      const doc = snapshot.docs[0];
      const data = doc.data();

      const storedImage = ref(storage, data.image);
      const url = await getDownloadURL(storedImage);

      const nftModule = thirdsdk.getNFTModule(process.env.NFT_MODULE);
      const nft = await nftModule.mintTo(req.params.addr, {
        name: 'Treasure: ' + data.name,
        description: data.description,
        image: url,
        properties: {
          latitude: data.location.latitude,
          longitude: data.location.longitude
        }
      });
      // link to opensea: https://testnets.opensea.io/assets/mumbai/{process.env.NFT_MODULE}/{nft.id}
      if (nft) {
        data.minted = true;
        data.owner = req.params.addr;
        await setDoc(doc.ref, data);
        res.send(JSON.stringify(nft));
      }
    } else {
      res.sendStatus(404);
    }
  } catch (err) {
    console.error(err);
    res.sendStatus(500);
  }
});

const http = express();
http.use('/', app);
const port = 5000;
if (process.env.NODE_ENV === 'production') {
  // use SSL in production
  const httpsServer = https.createServer({
    cert: fs.readFileSync(process.env.SSL_CERT),
    ca: fs.readFileSync(process.env.SSL_CA),
    key: fs.readFileSync(process.env.SSL_KEY)
  }, http);
  httpsServer.listen(port, (err) => {
    if (err)
      throw err;
    console.log('Listening on '+port);
  });
} else {
  http.listen(port, (err) => {
    if (err)
      throw err;
    console.log('Listening on '+port);
  });
}
There's actually just one API endpoint: /api/receive-treasure. (Well, two if you count the testing one.) It first retrieves the necessary details from Firestore, then loads Thirdweb's "NFT Module" in order to mint and transfer the NFT to the user's address.
To load the NFT module, we need a parameter for thirdsdk.getNFTModule(NFTModuleAddress). What's that? Well, it's the address next to your NFT collection that you've created in your Thirdweb project:
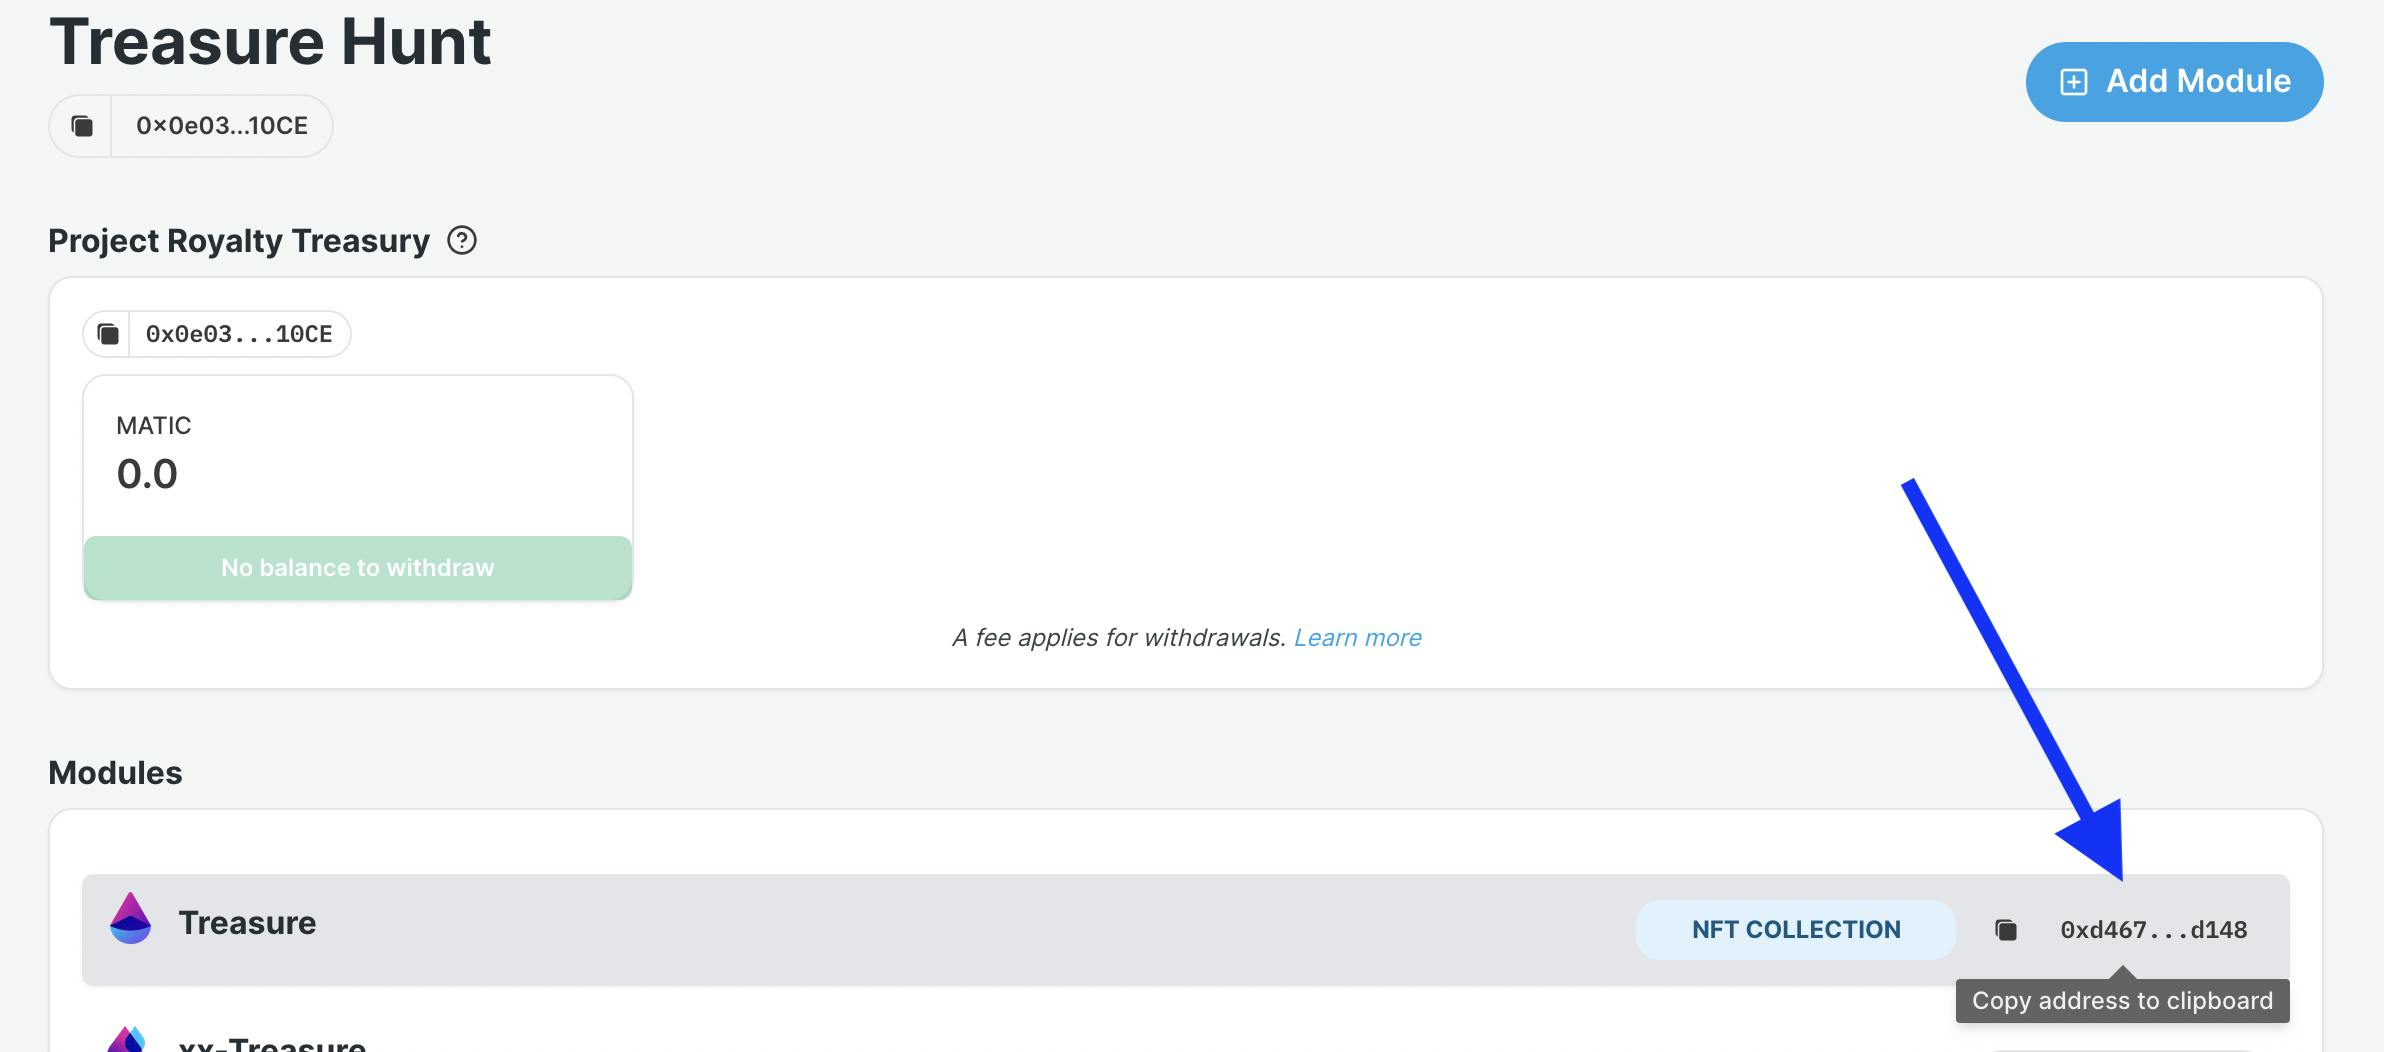
Simply copy-paste it there. Or better yet, paste it to .env, like I did!
Finally, if the NFT is minted and transferred successfully, we update our record on Firestore, and return to user.
Another great thing about thirdweb: remember for the NFT image we put it on Firebase storage? In fact, when we mint the NFT using that link, thirdweb actually helps to download it from Firebase, then upload it to IPFS, and use this reference instead for the NFT - all done automatically and behind the scene!
More treasures!
Back to src/App.js. Once the player has successfully claimed a NFT treasure, or when he/she simply wants to try another one, we can allow them to pick another treasure to play (from the array treasures which contains all treasures within 10 km):
const pickAnotherTreasure = () => {
    let k;
    for (var i = 0; i < treasures.length; i++) {
      if (target.current.geohash === treasures[i].geohash) {
        k = (i + 1) % treasures.length;  // just move on to the next one
        break;
      }
    }
    target.current = treasures[k];
    updateInstruction();
  };
8-bit craziness!
We will make use of NES.css for all the retro style touch!
Final words
That's it! We have implemented a location-based NFT game using thirdweb and Firebase!
Like I said, I haven't gone through all the details in the code, but all the essential ideas have been covered. You can always grab the full code in github: github.com/ganyinghung/treasure-hunt
I have also put the build here so you can play the game yourself (still on Polygon Mumbai): yhg.io/treasure-hunt
(Note: I haven't put in many geo locations though, so quite unlikely there is one within 50 km radius of your location. But if you want to test it out, do tell me and I'll create a spot close to you!)
I want to emphasise that there are many improvement and potential to this whole project:
- The server is too easy to be cheated. We should remove target location from the client and demand more proof before the server mint the NFT.
- Firebase and thirdweb project consoles are great and handy, but having a GM admin system too would be good.
- Apart from NFT, there can be other different types of treasures.
- The NFT treasure can link to real world economy! For example, a cafe shop can have a spot in the game and issue cash coupons in terms of NFT treasure. Or for a tourism site to issue NFT or tokens for visitors to collect.
The biggest hiccup, however, is that wallets on mobile phone generally do not support location access. So at the meantime you can only play it on, e.g. laptop. But given the huge potential of integration between geolocation and web3, I am sure wallets in the future will support it.